 |
Pages: « ... 24, 25, 26, 27, 28, 29, 30, 31, 32, 33, 34, 35, 36, 37, 38, 39, 40 » : All |
   |
|
 Author Author |
 Right - join Part A to Part B etc, etc, etc (currently 14,872 views) Right - join Part A to Part B etc, etc, etc (currently 14,872 views) |
| Bent Larsen |
| Posted on: July 3rd, 2018, 17:13:24 |
  |
|
Medium Member


Location: Denmark
Posts: 126
|
|
Excellent.
I knew I had seen it, but I could't find it the other day |
|
|
|
 |
Reply: 495 - 599 |
|
 |
| Graham Bichard |
| Posted on: July 8th, 2018, 17:01:17 |
|
|
Maximum Member2


Posts: 751
|
|
Thanks Craig - I swapped this over today. No difference 
Bent - interesting that there are several different variants. I ended up modifying the hinge that I had to fit. I still need to finish this off (repair and paint) but at least its another (IVA) job off the list. Just wish the thing ran properly... |
|
|
|
| |
Reply: 496 - 599 |
|
|
| Craig Smith |
| Posted on: July 8th, 2018, 18:28:17 |
|
|
Big Member


Location: Bury
Posts: 257
|
|
| I have not seen a circuit diagram for an SPI or MPI, but from experience the idle control valve is driven from an engine temperature sensor. It may or may not be the same one that drives the gauge, you will need to consult the schematic. That is where I would be looking from the symptoms you have described. |
Last modified July 8th, 2018, 18:29:06 by Craig Smith |
|
|
|
| |
Reply: 497 - 599 |
|
|
| Graham Bichard |
| Posted on: July 9th, 2018, 17:17:55 |
|
|
Maximum Member2
Posts: 751
|
|
Swapped over the MAP sensor this evening with the one from the mini - no difference.
Craig, the temp sender was swapped out when this problem arose (appeared on the OBD2 read out) given that it was only a few quid. Didn't fix it unfortunately. |
|
|
|
| |
Reply: 498 - 599 |
|
|
| Graham Bichard |
| Posted on: October 22nd, 2018, 13:10:05 |
|
|
Maximum Member2
Posts: 751
|
|
Sorry - no updates for a while (a few reasons why - broken wrist, laptop not working, problems at work) but the car went in for it's IVA on Friday 12/10/18.
It failed - as expected, but on relatively minor things (well, except for the brakes!). I'll go into more details soon. Suffice to say I've got a bit of time on my hands now, and a definitive list of things to correct.
Happy days  |
|
|
|
| |
Reply: 499 - 599 |
|
|
| mike brown |
| Posted on: October 22nd, 2018, 19:10:26 |
|
|
Big Member

Location: Southampton
Posts: 427
|
|
Congratulations on getting to an IVA. I look forward to hearing what your problems were.
Mike |
|
|
|
| |
Reply: 500 - 599 |
|
|
| Craig Smith |
| Posted on: October 23rd, 2018, 15:04:27 |
|
|
Big Member
Location: Bury
Posts: 257
|
|
The fact that you have put a smiley on your post says that it wasn't too bad a fail.
Look forward to hearing what you've got to remediate.
What was the cause of your running issue? |
|
|
|
| |
Reply: 501 - 599 |
|
|
| Graham Bichard |
| Posted on: October 24th, 2018, 11:19:41 |
|
|
Maximum Member2
Posts: 751
|
|
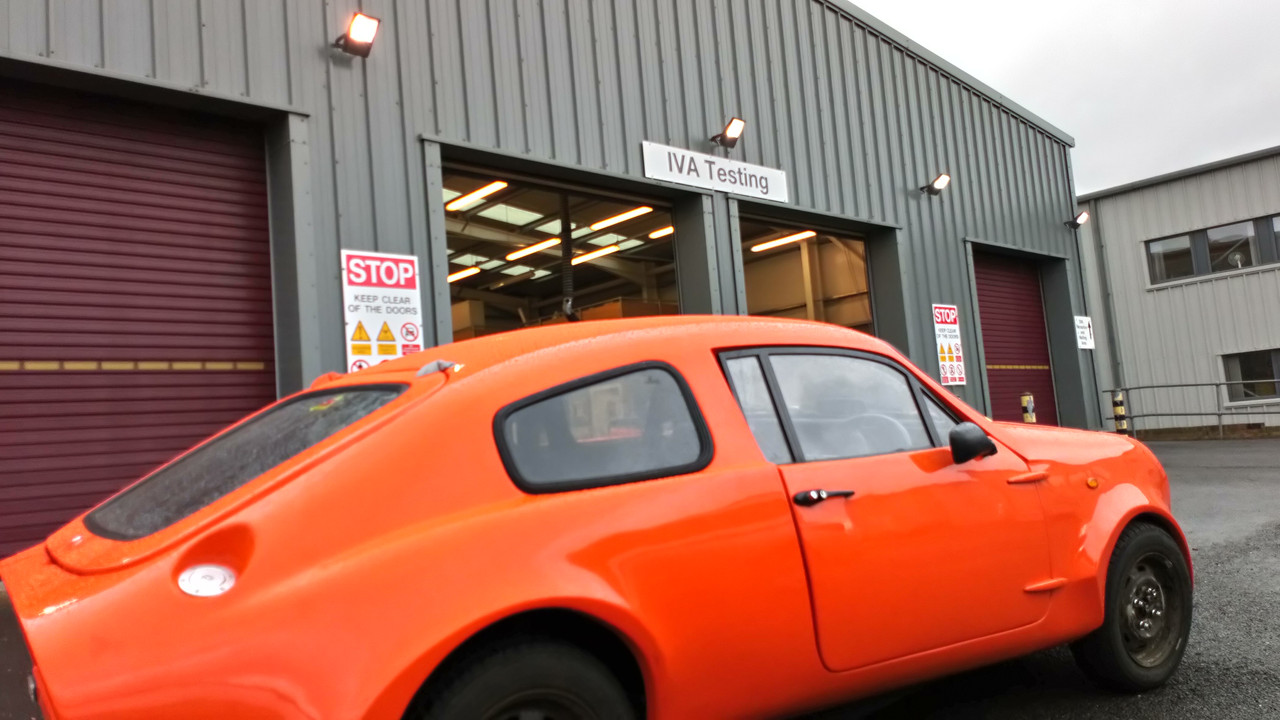
Craig - yes, I was quite enthused after the test. The three guys (Steve, Colin and Nick (who was an inspector/auditor reviewing Steve/Colin)) couldn't have been nicer, giving advice and the opportunity to rectify any problems they found there and then.
So what was wrong...
This was obviously the first time I've driven the car (to the test centre). My wife followed me in her car and I had the tow rope, jump leads, fuel can etc in the car just in case On driving it became apparent the suspension needed setting up, the car wandering a bit as I drove. The brakes also felt a bit spongy - we'll come back to that. I also noticed that the car came out of 4th gear on a light/closed throttle. But the speedo worked (hmm...), as did the wipers (it was raining) and the lights.
So here's the list:
1. The exhaust is blowing. I moved/seperated the exhaust in trying to solve the revving problem and couldn't get the exhaust to rerseal properly. I simply ran out of time to do this before the test but didn't want to postpone the test for a third time.
2. Emissions not tested. The car overheated. I'll come back to this (related to the revving problem).
3. Fuel pipe. Insecure nearside rear axle. The tester wants to see more P-clips securing this.
4. Fuel pipes near heat source. The tester wants to see the exhaust exiting from the right hand side instead of the left. Not sure how much of a difference this'll make, but the exhaust is designed for both left & right exit so this shouldn't be too problematic.
5. Fuel pipes in engine bay near to the exhaust manifold. The tester wants to see a shield placed between the fuel pipes. This applies to two areas of the fuel pipe routing. The current set up is as per the MPi mini, but I can see why this is requested. With a bit of inginuity this shouldn't bee to hard to devise.
6. Steering. On full right lock the tyre just contacts the lower coolant pipe. I should've spotted this, but no great problem to solve I think.
7. Handbrake linkage. The routing of this has the brake cable running against the car floor. I don't think this will cause a problem, but fitting a longer screw fitted with a spacer should solve this.
8. Brake pipe - where this runs across the front of the front subframe the tester wants to see more security (P-clips) to hold this in place.
9. Brake pipes - where the fuel pipes require more securing at the rear subframe (point 3 above), the rear brake pipes also need additional securing.
10. Servo pipework. The pipework runs through a convenient hole in the servo. This requires a grommet/rubber edging put in place.
11. Copper washer, master cylinder. There was a copper sealing washer misisng from one of the unions (I should've noticed this).
12. Brake warning light. On lifting the master cylinder cap out of the fluid, the test light in the interior should illuminate. It did briefly before not coming on again. Annoying as it's a new cap.
13. Braking. Pedal goes all the way to the floor.
This is related to the pedal feeling spongy on first driving. Turns out the master cylinder was failing. The more the brakes were pressed during the test, the worse the pedal became to the point where I couldn't safely drive the car at the end of the test. I'll come back to this.
14. Interior fittings. The door opening handle isn't rounded enough and the tester wants the handle turned the other way around (pointing down). Also the window winders aren't rounded enough. I've replaced these with standard mini items and put the door handles on 180 degrees about.
15. Exterior projections. The adjustable rear suspenion brackets have a screw thread. On the MM this projects beyond the sill, this needs cutting down/covering up.
16. Speedometer not checked. The speedo packed in a few miles before getitng to the test centre. I couldn't see anything obviously wrong with it - it still appeared attached at the speedo head. The cable was against the exhaust manifold so I suspect the heat may have melted the casingbut will only know this when I take it off and inspect. Worst case, the speedo drive gear have stripped in the gearbox (which will be bad. I think you need to strip the gearbox to change these out). Best case I need a new cable and re-route it.
17. Vehicle data plate. Axle weights aren't very clear (I stamped these on) and no all up weight shown. I'll ask if I can etch this info on instead of stamping.
18. Rear position lights dim. These the tail lights. Not sure what the answer is here - they're IVA approved LED tail lights. Might need to get an auto electrician involved.
19. Direction indicator, side repeater. The LHS side repeater isn't visible from the rear of the vehicle. These are angled units and I'd put the LHS unit in the wrong way around!
Easy fix.
20. Rear fog light not 'F/B' marked. The lens on the fog light is 'E' marked but the fog light needs this plus an 'F' or 'B' mark. Easy fix if I can find a suitable lense, otherwise I may have to fit an alternative light unit.
21. Interior heater pipes. These need a shield fititng in the passenger foot well, in case the pipes burst.
22. Bolt holding heater in place needs to be shortened.
23. Rear underbody cover contacts exhaust silencer. The right hand panel I made now contacts the exhaust silencer - I suspect the exhaust has moved (shaken into it's 'natural' position) on driving the car. I need to move the exhaust location anyway so hopefully no great problem.
24. Engine breather hose touching exhaust manifold.
25. No rear hub grease caps fitted. Now in place.
26. Nut security. There wer a number of nuts that the tester wants to see fitted with spring washers, lock nuts or nylock nuts.
27. Engine relay. I secured this to the rear of the airbox fitting frame with a zip tie. This wasn't acceptable. I can't mount this in the same position as on the mini (on top of the servo) due to the bonnet height. I'll have to see if I can mount this on to thre bulkhead.
28. Fuse box. Insecure in the footwell. I'll need to lok at this - this wasn't highlighted to me at the test but suspect it'll be the use of zip ties again.
29. Insecure wiring. This in the RHF engine bay area. More P-clips to the inner wing required.
30. Wiring through LHF inner wing. Requires the rubber grommet fixing in place to shroud the entry through the inner wing (it had become detached).
31. Starter motor main cable terminal. Needs a cover putitng ont he terminal.
And thats it. As I couldn't drive the car home, I contacted Green & White who came and collected the car (the test centre being halfway to their garage anyway). They set up the suspension (including fitting negative camber arms) and diagnosed/fixed the brake problem (master cylinder, copper washer, master cylinder cap).
But as you'll see, I don't think there's anything too onerous to be addressed in the list.
I have six months from the test date to arrange the retest (which will only look at the items which failed). And the test can be booked a year in advance meaning I have slightly less than 18 months to get the car retested. Given that I've just been laid off at work and am planning to take a couple of weeks off to recharge the batteries before concentrating on finding another job, I'm going to look at doing a few hours each afternoon to work through this list. So hopefully it won't take the full 18 months!
As for the revving problem - I asked G&W to look at this again while they had the car. They confirmed that the car was indeed hitting the rev limiter (approx. 6300rpm) and that it is the rev counter in the car which is reading incorrectly. However - the rev counter reads correclty, or near enough, at idle (around 850rpm). It then must be on some sort of exponential curve until it hits the rev limiter (rev counter records around 3200rpm). I'll need to look more into this, but in the short term I can live without a rev counter.
But when trying to test the emisions holding the car just below the point where the limiter cut in (3000rpm on the rev counter) the car got too hot so the test was abandonded. I have to say - the car doesn't sound like it's revving it's nuts off, even when comparing it withthe mini running alongside with ~3000rpm on it's rev counter.
Most worrying is, I do think the car is running rich. Now being injection/ecu controlled I'm not sure where the problem will lie. Once I've worked through the list I'll try and get the car emissions tested at my local MoT test garage to confirm it is running rich and then look more in to this.
But I do have to say driving the car to the test, it drove in a more civilised (read 'quieter') manner than I feared it might. So this bodes well for the car being used on a regular/daily basis.
So yes - smiley faces wrranted
|
|
|
|
| |
Reply: 502 - 599 |
|
|
| mike brown |
| Posted on: October 24th, 2018, 16:35:54 |
|
|
Big Member
Location: Southampton
Posts: 427
|
|
Well done that list is a bit longer than mine was but most of yours are easy fixes.
Mike |
|
|
|
| |
Reply: 503 - 599 |
|
|
| Neil KilBane |
| Posted on: October 25th, 2018, 13:40:01 |
|
|
Maximum Member2

just a little fine tuning left to do.
Location: Newtown Forbes, Ireland
Posts: 1,420
Reputation: 0 (tot: ) |
|
Nearly there Graham, you're on the homeward stretch.
Just to ease your mind a bit, the speedo drive on the gear box is not a gearbox strip job. The main speedo drive is easily removed by undoing the bolt on the drive housing. |
|
|
|
|
| |
Reply: 504 - 599 |
|
|
| Graham Bichard |
| Posted on: November 3rd, 2018, 16:53:16 |
|
|
Maximum Member2
Posts: 751
|
|
No. 6 - done.
No. 8 - done.
No. 10 - done.
No. 11, 12, 13 - done.
No. 14 - done.
No. 16 - in hand. New cable ordered with the inner 15mm longer at each end. I still need to check the pinion drive. I've also ordered a heat sheath shield for the replacement cable.
No. 19 - done.
No. 20 - done.
No. 21, 22 - done. The new shield piece looks quite good actually, an improvement over what was there before.
No. 23 - did I say it should be quite easy to get the exhaust exiting from the RHS? It probably would if I could get the exhaust to seperate! Even the hot blue spanner isn't working. Hmm....
No. 24 - done. I'll also put some heat sheath on this too.
No. 25 - done.
No. 27 - in hand. I've made a bracket which I'll look to pop rivet to the bulkhead to mount this relay pack to but can't position/fix this until the speedo cable is in place.
No. 28 - done, I think. There were four relays up behind the main fuse box (drivers footwell) which I've secured with tie wraps to the dash brace bar. I'll need to check if tie wraps are acceptable.
No. 29, 30 - done.
No. 31 - in hand. I need to find more suitable terminal covers to fit to some of these.
Just listing progress so I can keep the enthiusiasm going! And because I've come to a bit of a standstill while I wait for a few things to arrive in the post.
The exhaust not coming apart is a bit of a bummer - I can even see me having to buy a replacement system at this rate. As I say, even using heat and a chain strap wrench only succeded in crushing the pipe in a couple of places .
|
|
|
|
| |
Reply: 505 - 599 |
|
|
| mike brown |
| Posted on: November 4th, 2018, 08:45:51 |
|
|
Big Member
Location: Southampton
Posts: 427
|
|
No28 can you not cut a piece of Ali to have tabs for the relays to slide on to then rivet/screw it in place. Failing that the discovery has several of these rails that you may be able to cut off in a breakers (one of them is riveted in place I think behind the dash).
Mike |
|
|
|
| |
Reply: 506 - 599 |
|
|
| Graham Bichard |
| Posted on: November 5th, 2018, 10:44:37 |
|
|
Maximum Member2
Posts: 751
|
|
Mike, I created aluminium locating tabs for the numerous relays which are mounted on the engine bay bulkhead.
The problem I had with these footwell relays is the position - to access these involves lying on my back with the sill digging into your mid-back, with you head in the footwell itself (perhaps why I missed these on the look over of the car before submitting for test). I'm too old these days to do this for any length of time!
The only place I think I'd be able to mount a metal plate would be to the lower dash rail which I've used anyway for the cable ties. I suspect I may have to change my solution though given that the cable tie wasn't acceptable for the main engine relay. I'll ask the IVA guy when I've worked through the list fully.
|
|
|
|
| |
Reply: 507 - 599 |
|
|
| Graham Bichard |
| Posted on: January 19th, 2019, 17:05:22 |
|
|
Maximum Member2
Posts: 751
|
|
Well, its been a while since I've posted (Happy New Year to All!) and I've been popping in to the garage and doing the odd bit of tinkering, working on the front end of the car sorting out the IVA points under the bonnet and in the front wheel arches.
So this afternoon I went to turn the car around which involved starting the engine for the first time in a good while. Now while the car fired up fairly easily after a couple of churns, the left hand (red) light in the 3 clock instrument binnacle didn't extinguish so I switched the engine off.
Unfortunately I don't have the mini to compare with anymore but I think the left/red light is for charging, the right/orange (which did extinguish) is for oil. Not being sure I switched the engine off as I say, but can someone with a better memory than me confirm the red light is for charging faults?
I ended up pushing the car around and up onto the ramps (backwards). I'll look to make a start on the points I need to address on the rear of the car now (on the slightly less cold days at least).
|
|
|
|
| |
Reply: 508 - 599 |
|
|
| Simon Robinson |
| Posted on: January 19th, 2019, 21:42:32 |
|
|
Big Member

Location: Northampton
Posts: 338
|
|
| Red is battery, orange is oil pressure. If it's not run for a while, it could just be the battery charge has dropped so will need to run for a while so the alternator can charge it. |
D&H Mk IV 8313, KGV 215V (aka George) - 75,000 miles and counting since restoration in 2011. |
|
|
|
| |
Reply: 509 - 599 |
|
|
Pages: « ... 24, 25, 26, 27, 28, 29, 30, 31, 32, 33, 34, 35, 36, 37, 38, 39, 40 » : All |
|
|


 Mini Marcos Forum > General Boards > Mini Marcos > Right - join Part A to Part B etc, etc, etc
 Logged