 |
Pages: « ... 13, 14, 15, 16, 17, 18, 19, 20, 21, 22, 23, 24, 25, 26, 27, 28, 29, 30, 31, 32, 33 ... » : All |
   |
|
 Author Author |
 Right - join Part A to Part B etc, etc, etc (currently 14,514 views) Right - join Part A to Part B etc, etc, etc (currently 14,514 views) |
| Graham Bichard |
| Posted on: August 3rd, 2015, 14:55:27 |
  |
|
Maximum Member2


Posts: 751
|
|
Pistons arrived:
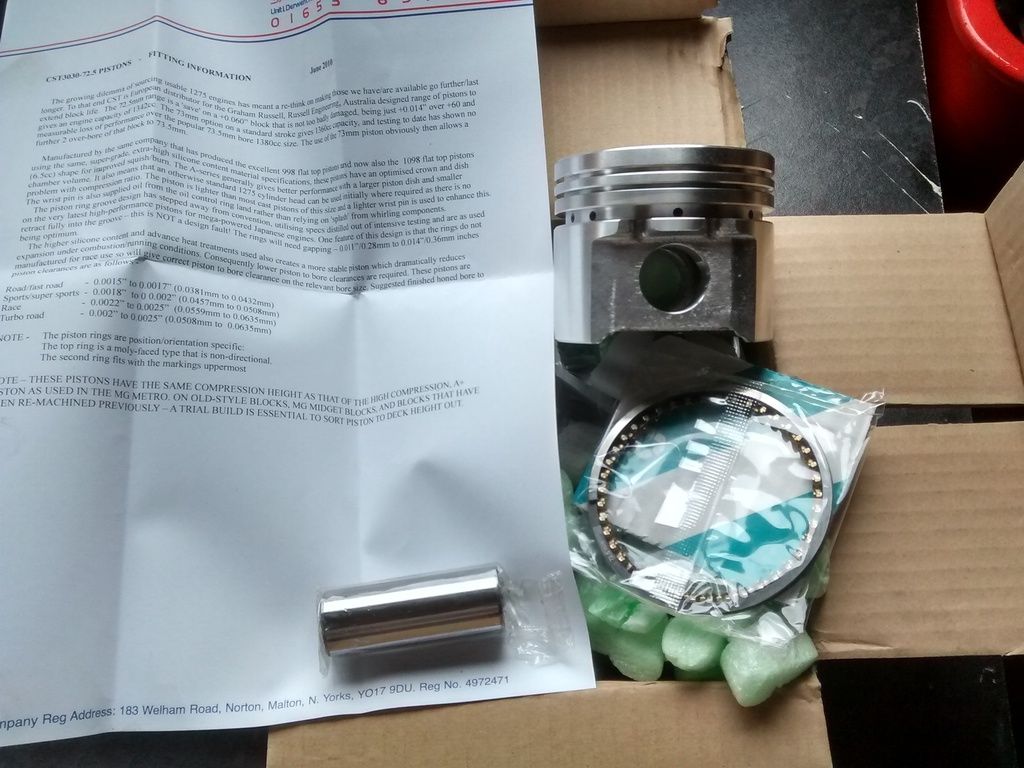
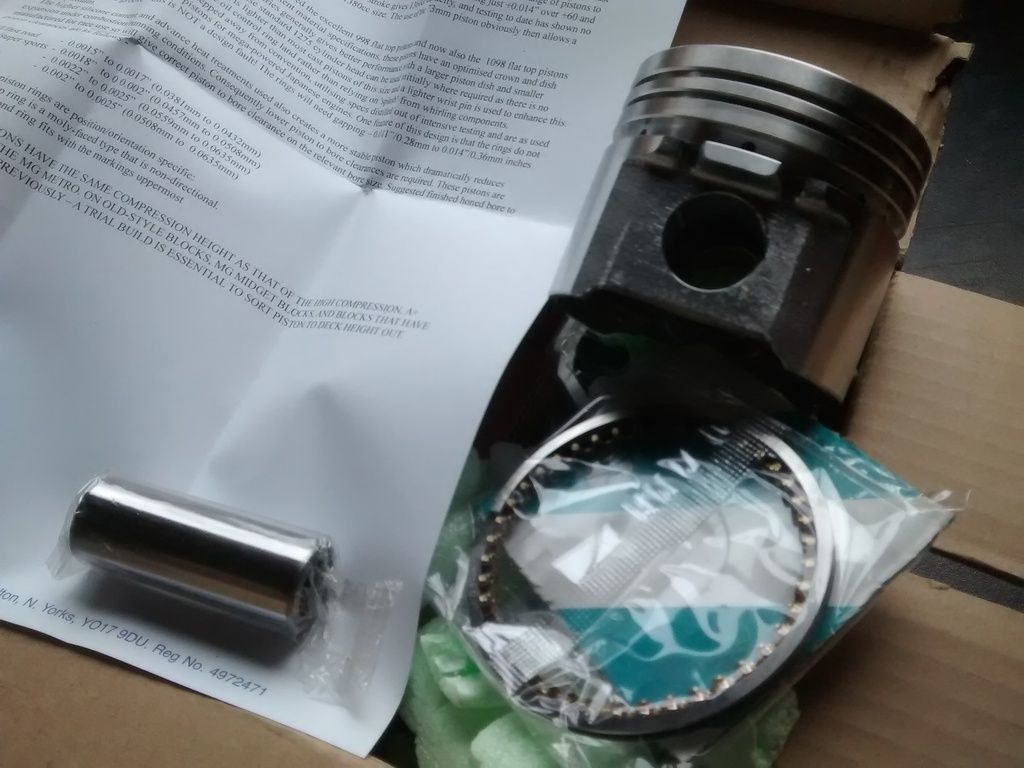
Took the block/cranks/pistons & rods etc along to Green & White's this morning who will be getting the machining done for me.
Also the gearbox I rebuilt (something not quite right with it so I'm getting them to look at it for me).
Should be ready for collection in a couple of weeks which will give me time to clean and paint the other bits. |
|
|
|
 |
Reply: 330 - 599 |
|
 |
| Graham Bichard |
| Posted on: August 5th, 2015, 10:44:54 |
|
|
Maximum Member2
Posts: 751
|
|
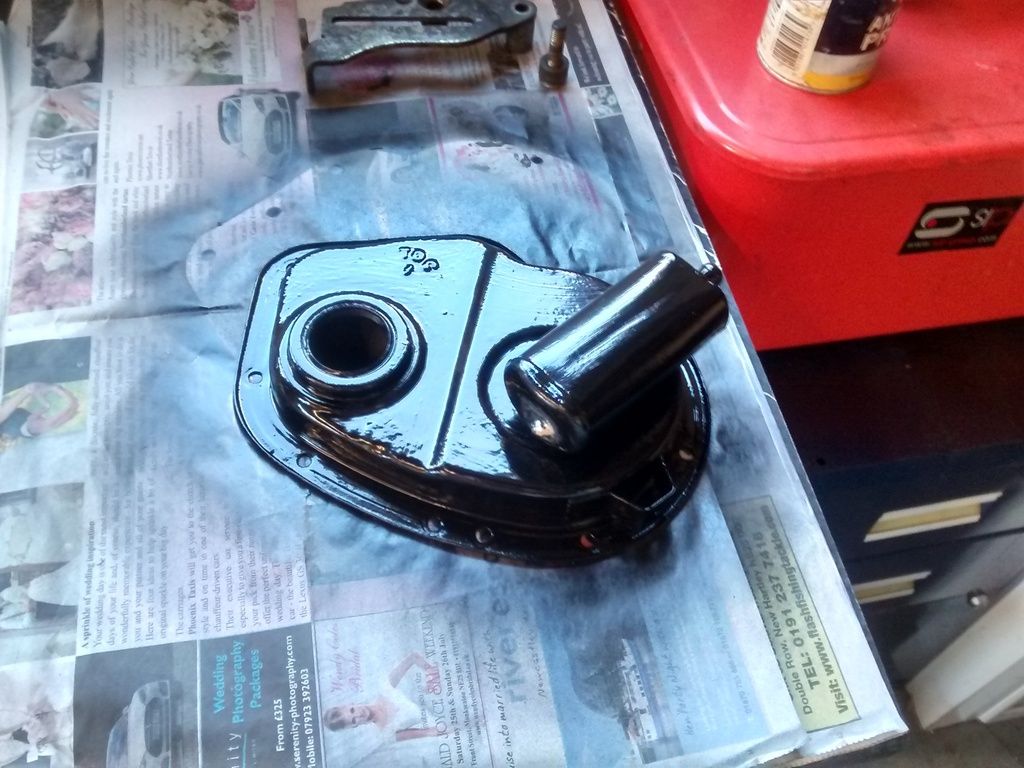
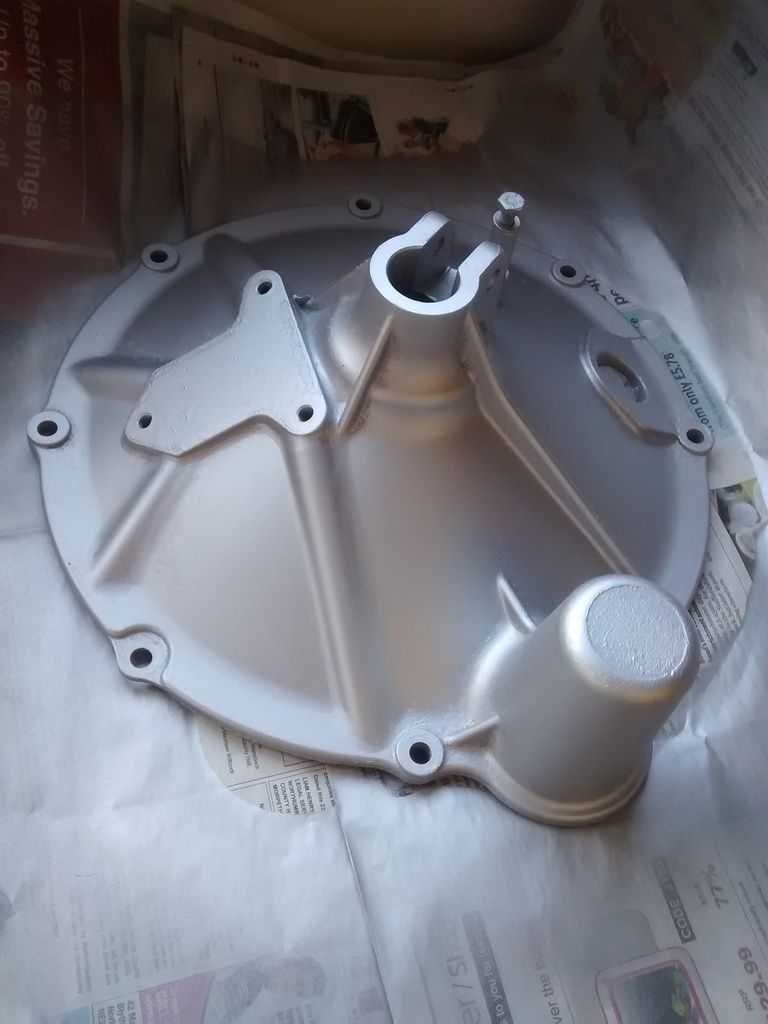
Timing cover prepared for the duplex timing chain (dent removed, internal ring ground down) and painted:
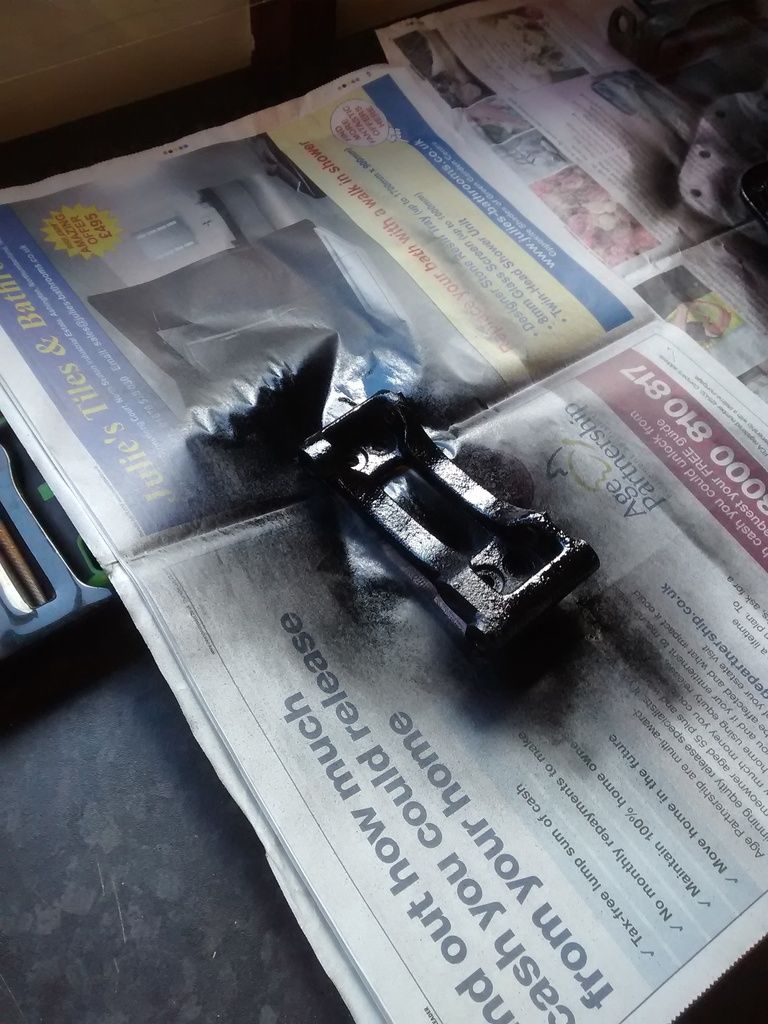
Cleaned and sprayed the alternator bracket while I was at it:
 |
|
|
|
| |
Reply: 331 - 599 |
|
|
| Graham Bichard |
| Posted on: August 5th, 2015, 13:20:09 |
|
|
Maximum Member2
Posts: 751
|
|
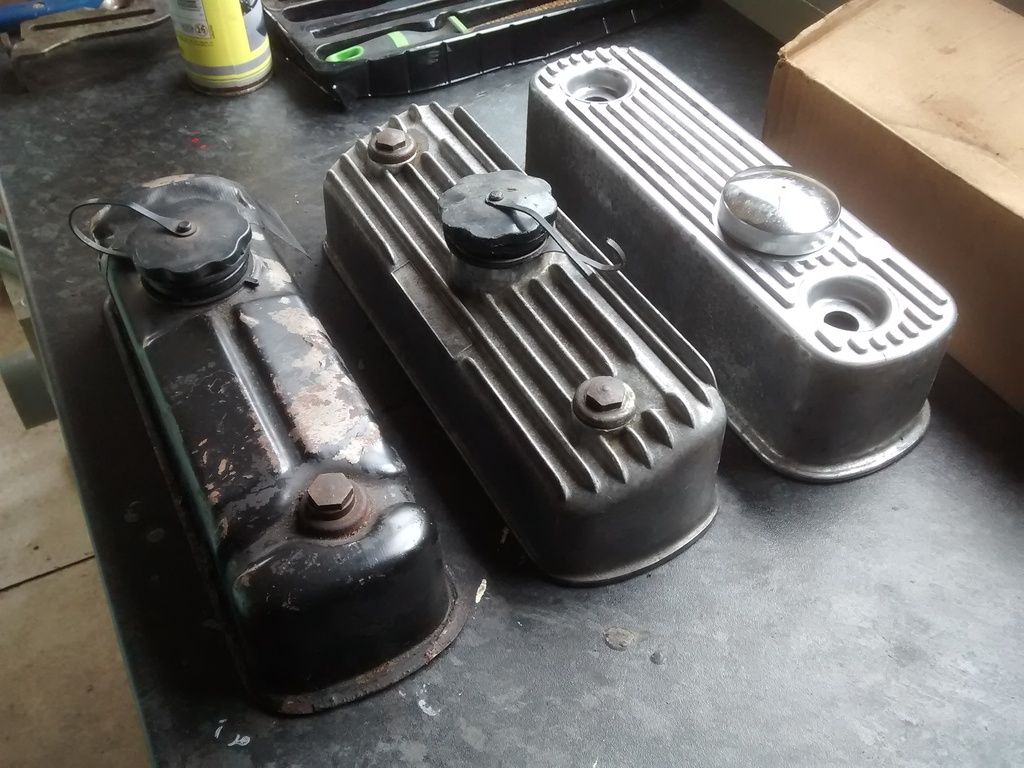
Looking at other little bits & pieces I can get done while waiting for the big engine bits to return - the all important rocker cover. I've got a choice of three:
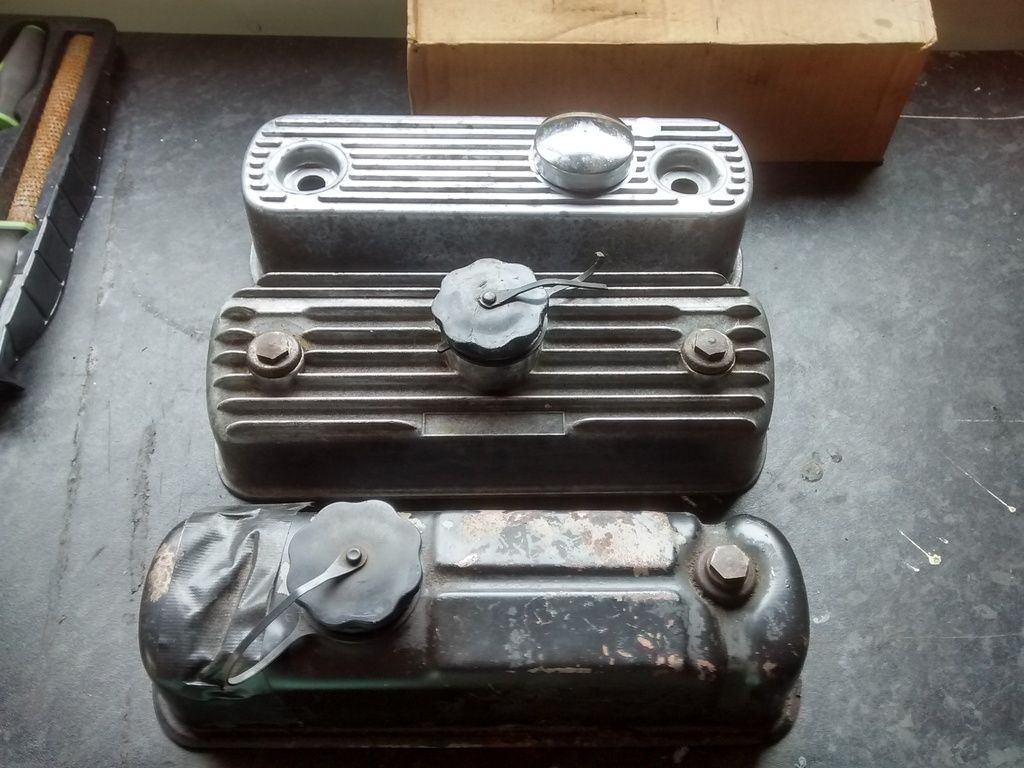
Standard, MG Metro type or alloy.
Unless you can advise me differently, I don't think the 1.5 roller tip rockers I'm going to use will fit under the MG type cover (which is a pity as I like the look of this (middle) one).
I'm intending to give the cover a crackle black finish, which means roughing up the surface to provide a key before painting (hence something I can do in the meantime). When I ran the alloy cover on the mini I never seemed to be able to get a good seal, it weeping oil from the cork gasket area. Perhaps the silicon gasket will stop this, but it would be better if it had a lip to retain the gasket (like the radius edge on the standard tin cover).
I have painted a standard cover with wrinkle paint before and its lasted quite well on the mini (the edge starting to chip in a couple of places now):
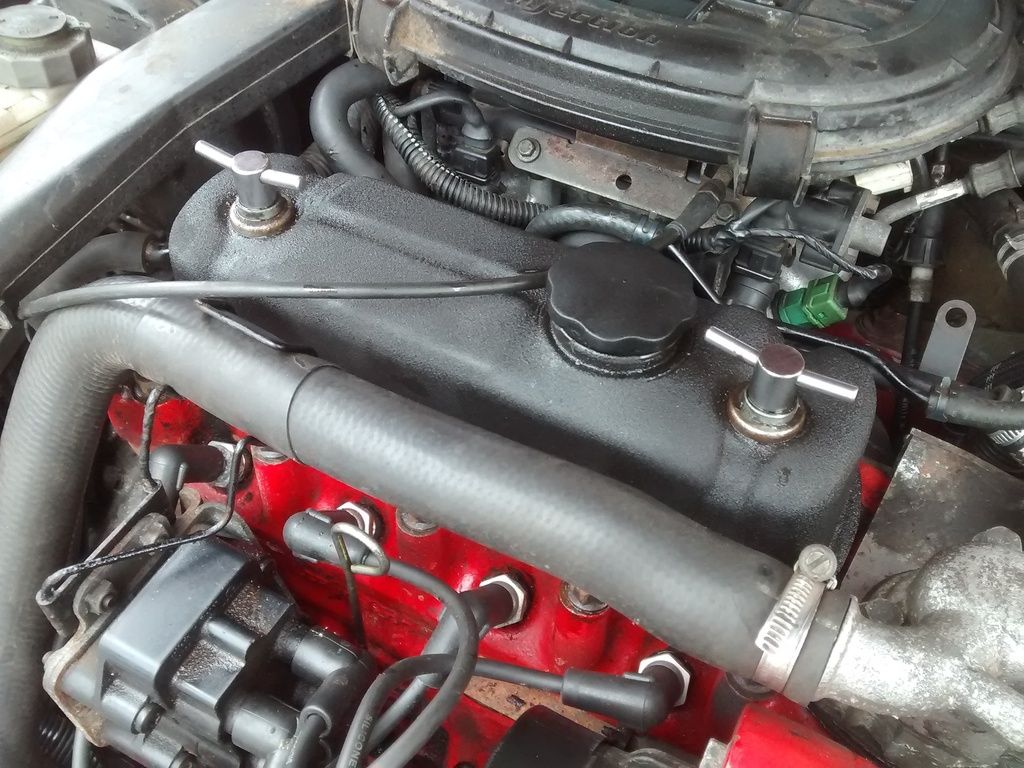
The idea of painting it black is to fit the theme of limited bright work on the car (only the fuel filler so far).
Opinions? |
|
|
|
| |
Reply: 332 - 599 |
|
|
| jimnaylor |
| Posted on: August 6th, 2015, 15:49:06 |
|
|
Big Member


Location: Bedfordshire
Posts: 222
|
|
| I'm using the MG cover with 1.5 roller rockers, and I have an offset valve head which makes matters worse. I needed to remove a very small amount of metal to clear the rockers at either end but there was plenty thickness. I suspect without offset exhaust valves it will probably clear without any metal removal. |
|
|
|
| |
Reply: 333 - 599 |
|
|
| Graham Bichard |
| Posted on: August 6th, 2015, 19:11:48 |
|
|
Maximum Member2
Posts: 751
|
|
Is this going too far:
I'm not usually one for tarting up bits - as long as somethings clean and servicable, but I've quite enjoyed cleaning up the components this week.
If nothing else it uses up the part used spray tins I've had on the shelves for ages!
I'll have a crack at the MG rocker cover Jim, if it looks like it might work. |
Last modified August 6th, 2015, 19:12:33 by Graham Bichard |
|
|
|
| |
Reply: 334 - 599 |
|
|
| Graham Bichard |
| Posted on: August 7th, 2015, 17:44:10 |
|
|
Maximum Member2
Posts: 751
|
|
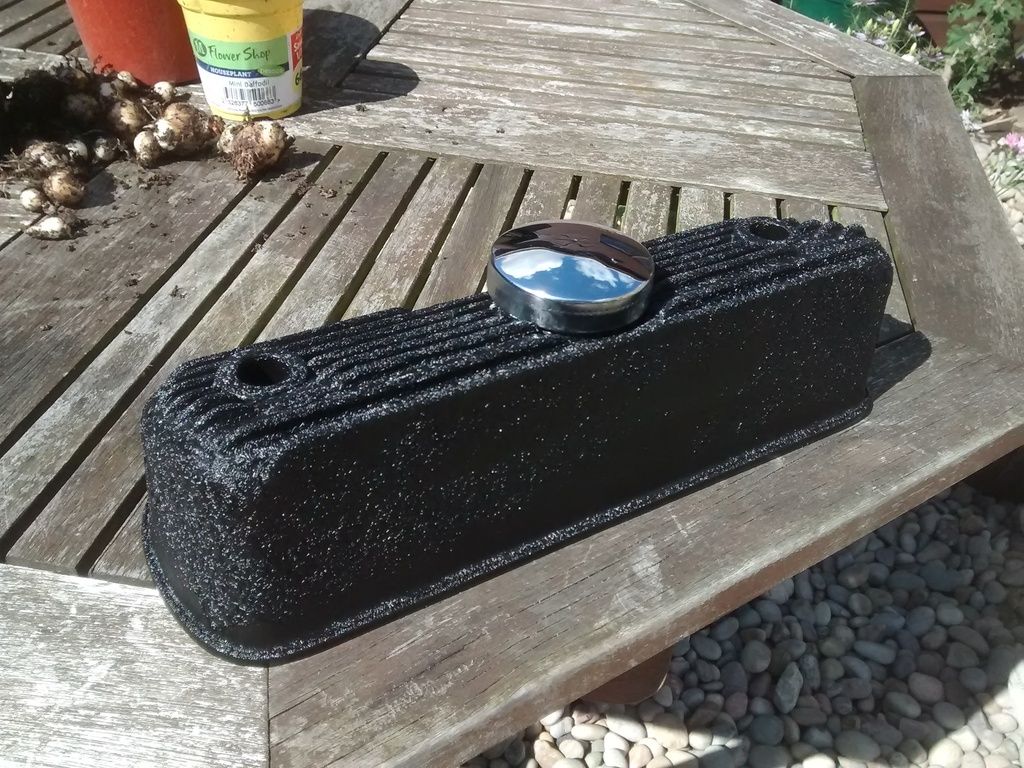
Looks good painted:
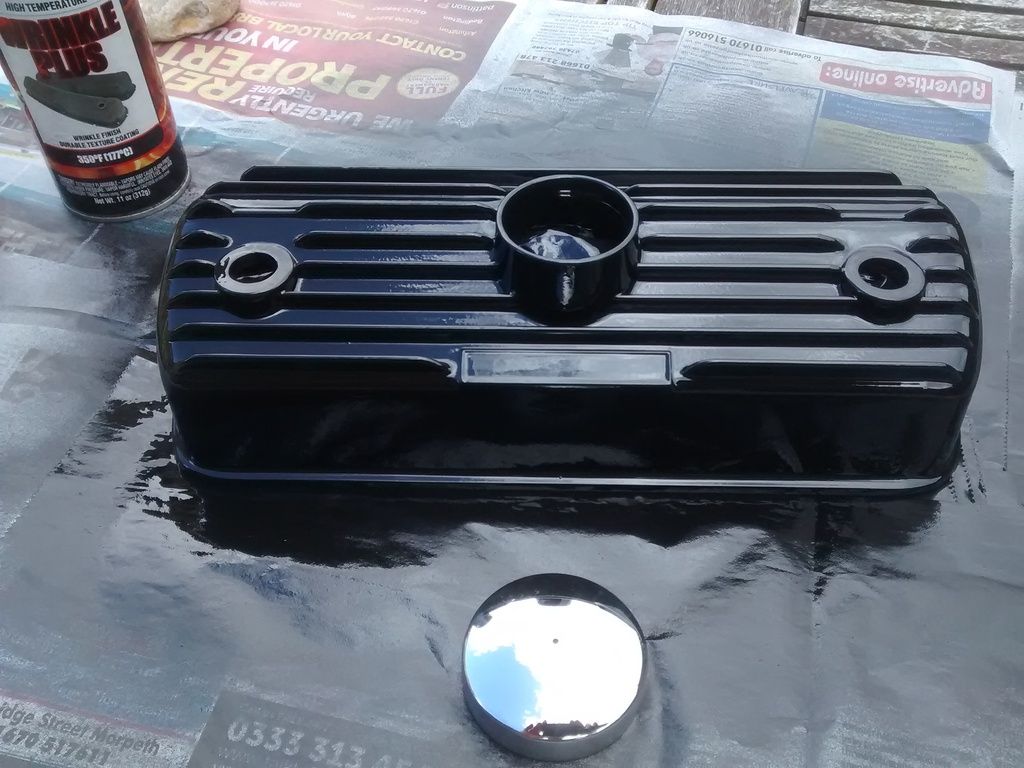
The chrome cap might look good against the black - I'll try and see if it fits when its dried properly (up to 48hrs to dry fully and for the wrinkles to appear.
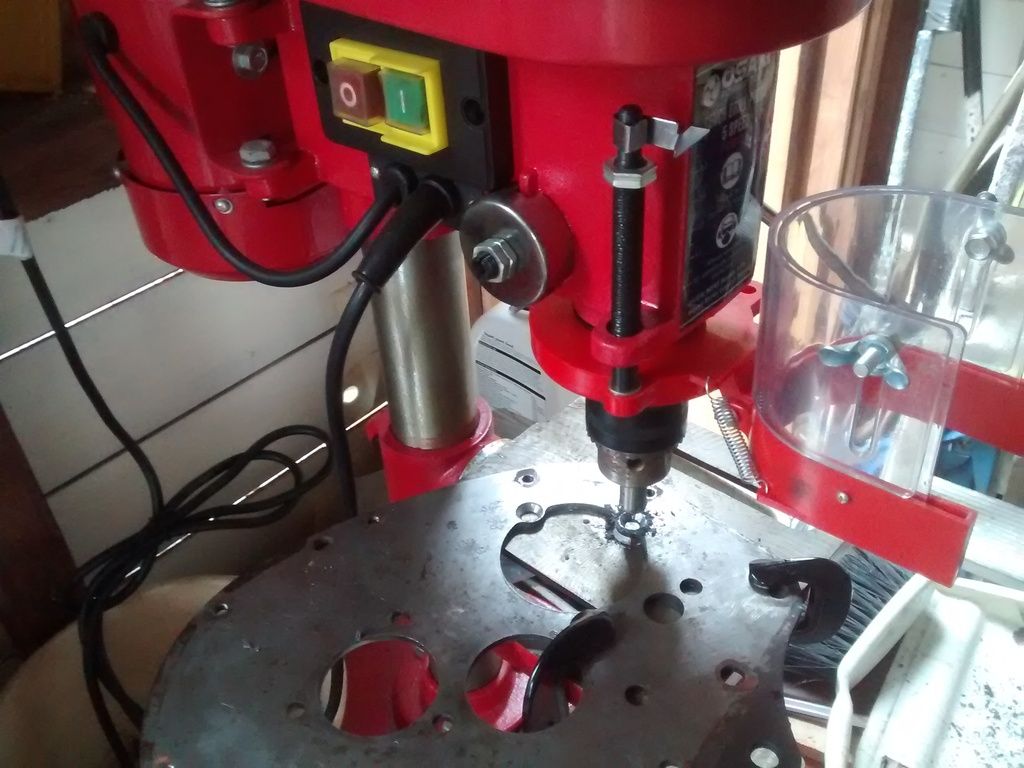
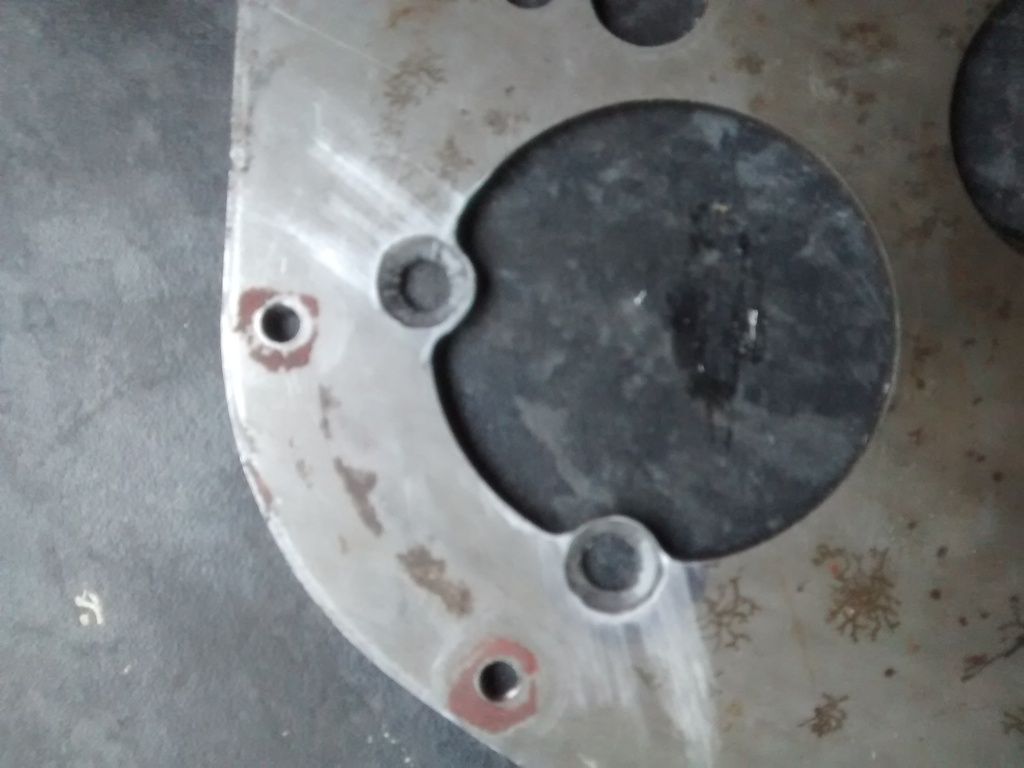
Also modified the cam cover plate today to accept the countersunk screws. My little hobby drill isn't really that good, but is good enough for this (with a little cleaning up with a needle file afterwards):
 |
|
|
|
| |
Reply: 335 - 599 |
|
|
| mike brown |
| Posted on: August 7th, 2015, 17:54:29 |
|
|
Big Member

Location: Southampton
Posts: 427
|
|
I would suggest the problem with the countersinks lay with the countersink not the drill. Either blunt or the wrong type for the material.
Mike |
|
|
|
| |
Reply: 336 - 599 |
|
|
| Graham Bichard |
| Posted on: August 8th, 2015, 10:34:35 |
|
|
Maximum Member2
Posts: 751
|
|
Mike, it's a reasonable new countersink, for 'metal' but when you lower the drill bit you can move the vertical pillar.
I try and keep the table as close to the bit as possible to try and reduce the movement, and only clamp up the work piece after offering up the bit to the job (to try and centralise the drill).
But its better than the hand drill stand I had previously (and it was cheap), but I won't be doing any real precision jobs with it!
That'll have to wait until I've won the lottery and move into a properly equipped little workshop 
Rocker cover has now dried (still another 24hrs to harden though):
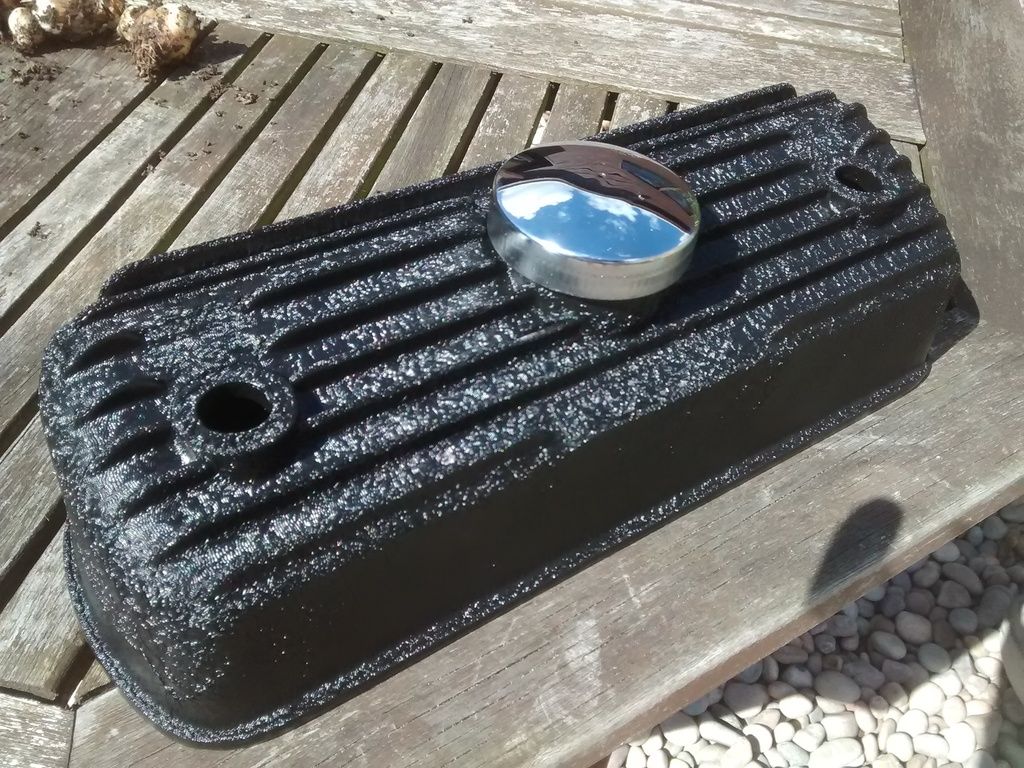
The wrinkles aren't as tight as the metal cover on the mini - I seem to remember that I cured that in a cool oven (as recommended on the tin) to achieve a tighter wrinkle but it looks okay.
I'm not sure if I preferred the smooth paint to be honest, but if it's good enough for a 60's Ferrari.... |
|
|
|
| |
Reply: 337 - 599 |
|
|
| Graham Bichard |
| Posted on: August 8th, 2015, 13:30:23 |
|
|
Maximum Member2
Posts: 751
|
|
I have this oil pressure gauge fitted to the car:
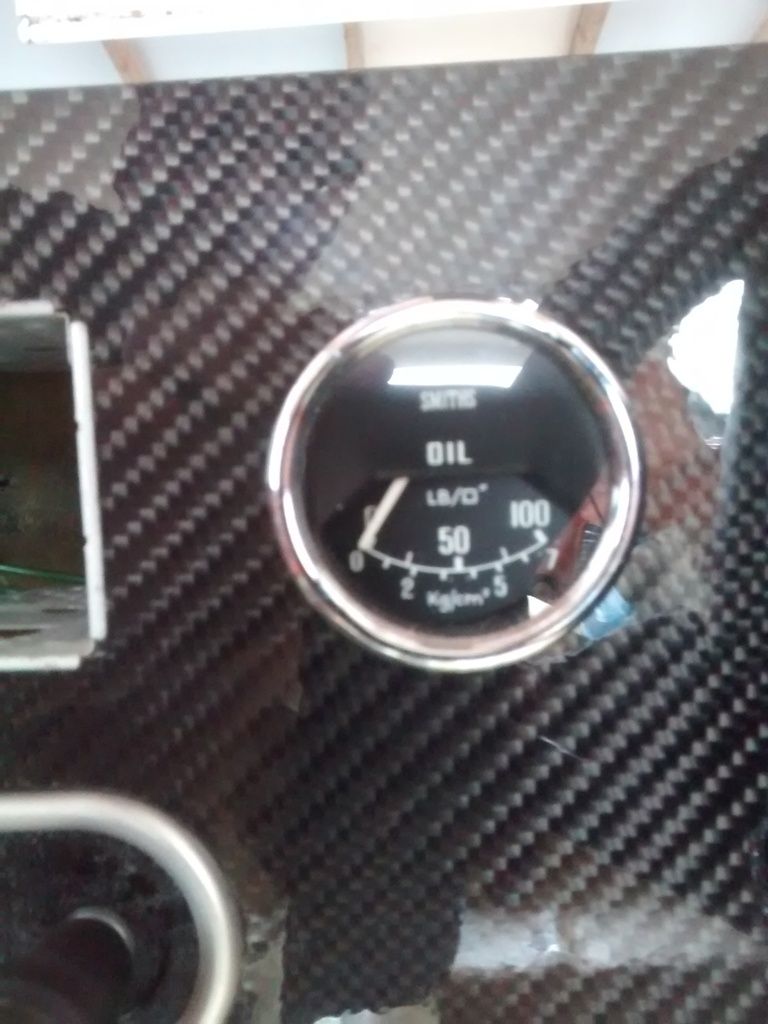
I thought I'd take it out and have a closer look how it's meant to be connected up. I have previously bought an oil gauge connection kit comprising fittings and pipe to try and allow me to mock up to the back of the gauge. Unfortunately the fittings don't seem to match:
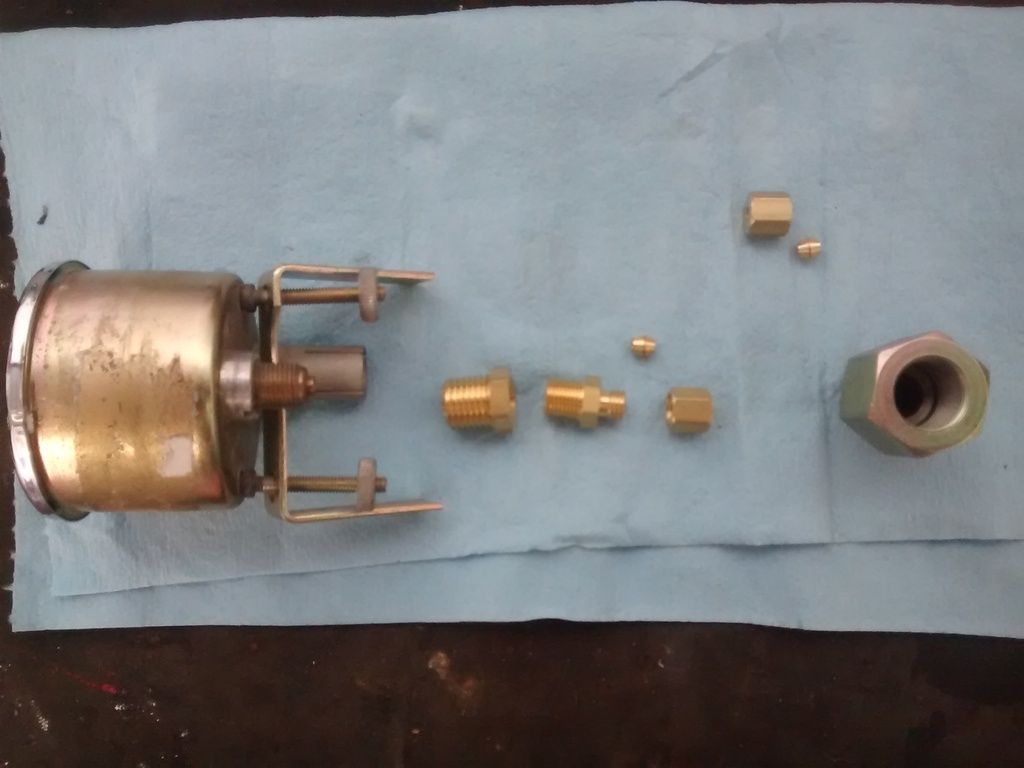
With the gauge on the left and working left to right, the first bright connector screws to the back of the gauge. The next piece I thought would connect to the first piece, sleeving down the diameter and has an internal face (on the right hand end as viewed) to receive an olive. Unfortunately its the wrong size to fit the first piece. Next is the olive, followed by the retaining cap (through which the pipe fits). The larger through piece on the right isn't part of the kit - it's a sump plug adaptor I have which can be used as a method for 'T-ing' in an oil pressure gauge.
The two pieces located above in the photo are another olive and retaining cap (for the other end of the oil pressure pipe). But where on the engine would this connector plumb in to?
I can perhaps have an adaptor piece made if I can identify the threads or I'll need another fitting kit which will work with this gauge.
Given my recent experiences with high oil temperatures I'm tempted to perhaps get a combined temp/pressure gauge, but even if I do I'll need to run an oil pipe and have suitable fittings.
Anyone out there got any experience of fitting one of these gauges? |
Last modified August 8th, 2015, 13:30:58 by Graham Bichard |
|
|
|
| |
Reply: 338 - 599 |
|
|
| Graham Bichard |
| Posted on: August 8th, 2015, 14:35:28 |
|
|
Maximum Member2
Posts: 751
|
|
Looking at the other jobs that I can be getting on with over the next few weeks and one that immediately springs to mind is the fitting of the rear hatch.
The hatch has already been drilled prior to me getting my hands on the car - lets hope the holes are in the right place:
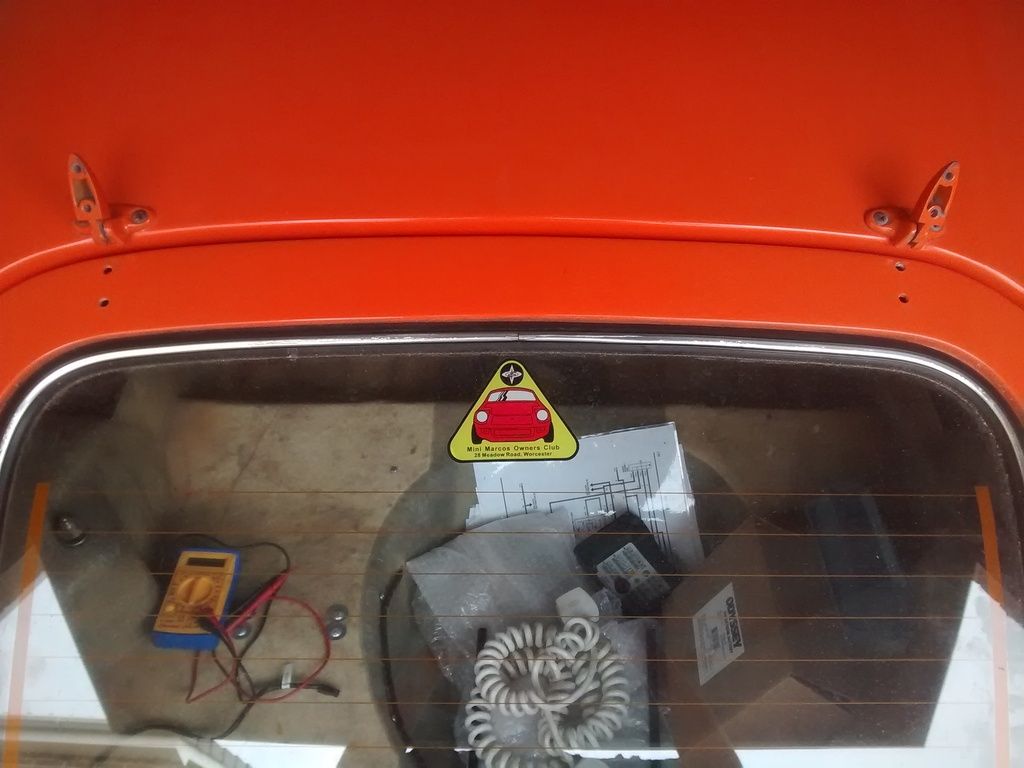
I believe there's a rubber gasket which should be fitted between the hatch and the hinge?
Also can someone tell me the thread/length of screw for these hinges:
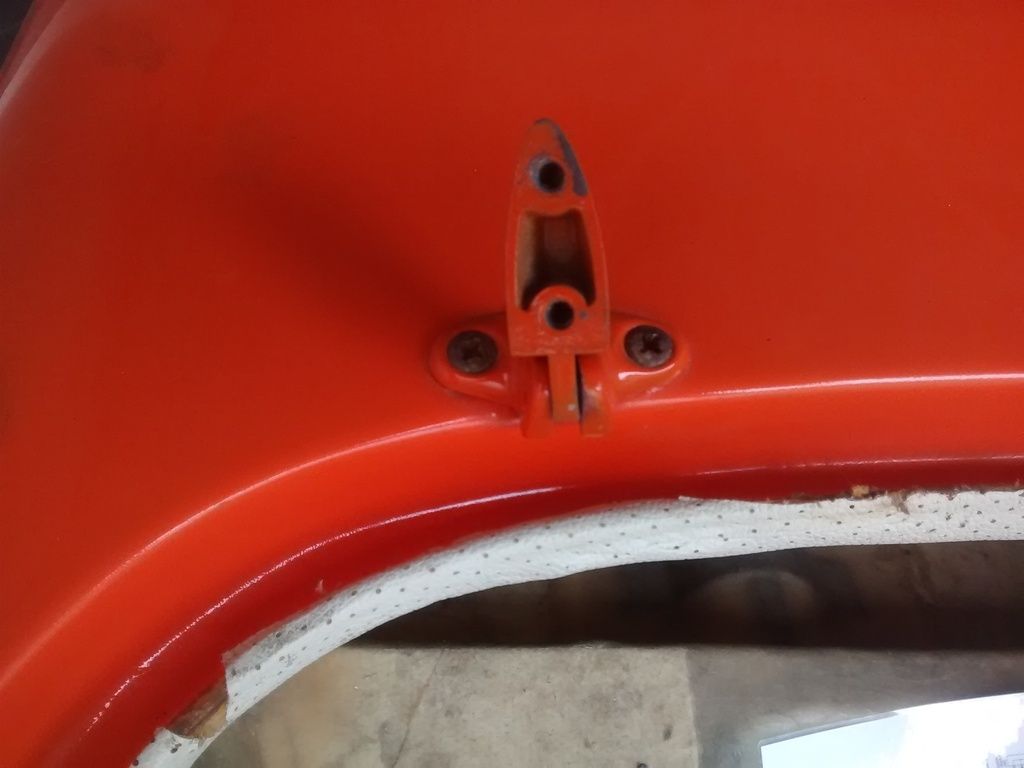
I'll need some rubber seal for this aperture also - something like this:
http://www.carbuildersolutions.com/uk/large-bead-edge-seal
Will that be too large? They do a smaller bead which may be more suitable:
http://www.carbuildersolutions.com/uk/edge-seal
Gone are the days of going down to the local scrappy and taking something that looks right for a couple of quid, eh?
Which leads on nicely to the next question - I'd like to fit struts to the rear hatch to keep it in an open position.
Can anyone advise me/direct me to a suitable type? Also any pictures of these in position on your cars?
Looking at my hatch there isn't a lot of meat to drill into to position these - do you literally drill through the edge of the hatch?

|
|
|
|
| |
Reply: 339 - 599 |
|
|
| Graham Bichard |
| Posted on: August 8th, 2015, 15:50:45 |
|
|
Maximum Member2
Posts: 751
|
|
Why is nothing ever simple! I thought while I had the hatch to hand I'd put in the new key/lock that I have (I bought a set of door/boot locks so that I'd have a common key - I never received any keys when I got the car), only to find the one fitted to the boot is a different design/type:
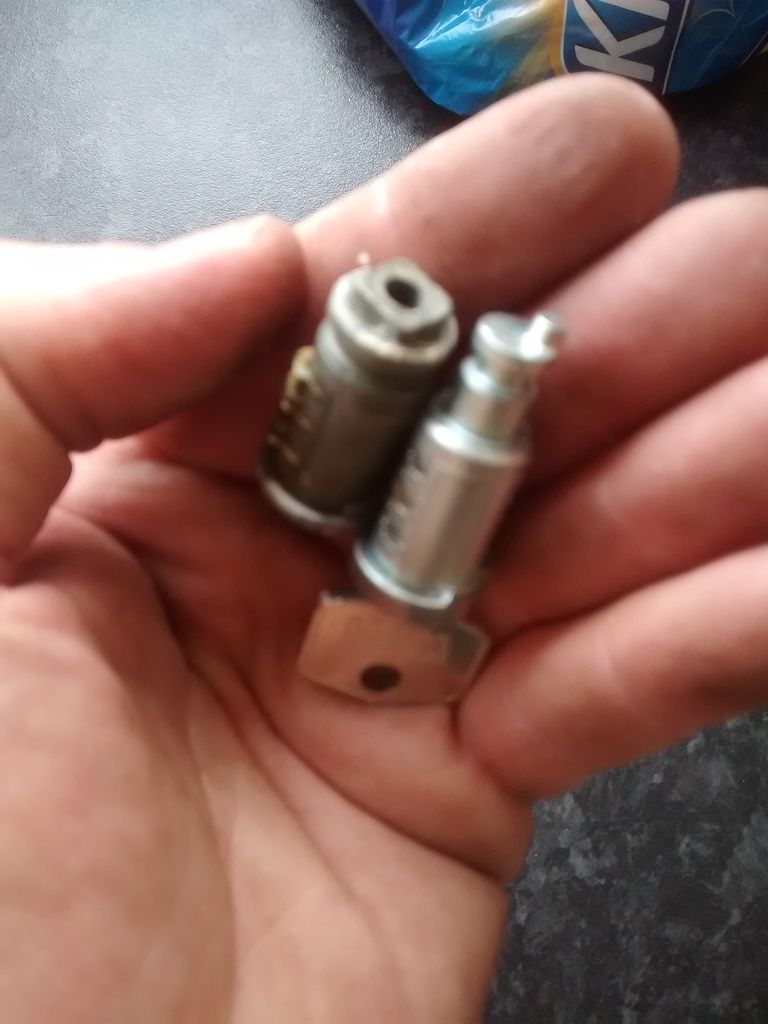
The old one has a screw which attaches at the base (interior side) and holds the latch in position. The new one obviously doesn't. Is it case of having to drill & tap a lock, or have I just bought the wrong type?
Moving onto the doors, I thought I'd swap them out but having opened the door in the garage I think that job can wait until the cars back on its wheels and there's no garage wall that the open door can bang into!
 |
|
|
|
| |
Reply: 340 - 599 |
|
|
| admin |
| Posted on: August 8th, 2015, 15:58:29 |
|
|
 Administrator Administrator


Location: Maidenhead, UK
Posts: 2,380
Reputation: 1 (tot: 1) |
|
For the oil pressure gauge you really need to buy the complete pipe that goes with it, plus an adapter if you want to have an oil pressure warning light as well.
All the hinges have fibre gaskets but they aren't always used on Mini Marcoses. If you're at a Mini show in the south lookout for a guy called Keith (can't remember his surname) who always has a good stock of these.
You can get the rubber seal for the hatch from Phoenix Supplies among others. They regularly attend shows. The seal cross section is like an upside-down U that clips onto the flange with either an O or a C sitting on top of it, total height about 2cm. I can measure ine if necessary. |
|
|
|
 |
Reply: 341 - 599 |
|
|
| admin |
| Posted on: August 8th, 2015, 16:06:13 |
|
|
Administrator
Location: Maidenhead, UK
Posts: 2,380
Reputation: 1 (tot: 1) |
|
| You bought the wrong type. The barrel on the right is for a locking door handle. It is retained by a roll pin which engaes with the neck at the top (inside end). The barel on the left is for a panel lock which you are likely to have on the rear hatch and bonnet. |
Last modified August 8th, 2015, 16:08:17 by admin |
|
|
|
| |
Reply: 342 - 599 |
|
|
| Simon Robinson |
| Posted on: August 8th, 2015, 18:13:33 |
|
|
Big Member

Location: Northampton
Posts: 338
|
|
I have used Seals Direct for the boot & door seals before, off the top of my head can't remember which one it was but they have plenty to choose from, the webpage shows all dimensions you should need as well as a cross section:
http://www.sealsdirect.co.uk/shopping.asp?intDepartmentId=68#23 |
D&H Mk IV 8313, KGV 215V (aka George) - 75,000 miles and counting since restoration in 2011. |
|
|
|
| |
Reply: 343 - 599 |
|
|
| Graham Bichard |
| Posted on: August 8th, 2015, 18:37:56 |
|
|
Maximum Member2
Posts: 751
|
|
Thanks guys - looks like a bit of trial and error with the seal dimensions and a new lock required.
Any idea of the screw thread / length for the hinge on the rear hatch?
Looking for other things to do this afternoon I've wrapped the exhaust manifold. I've chosen a Specialist Component's stainless manifold after I experienced a split in the centre of the 'Y' on a Maniflow unit:
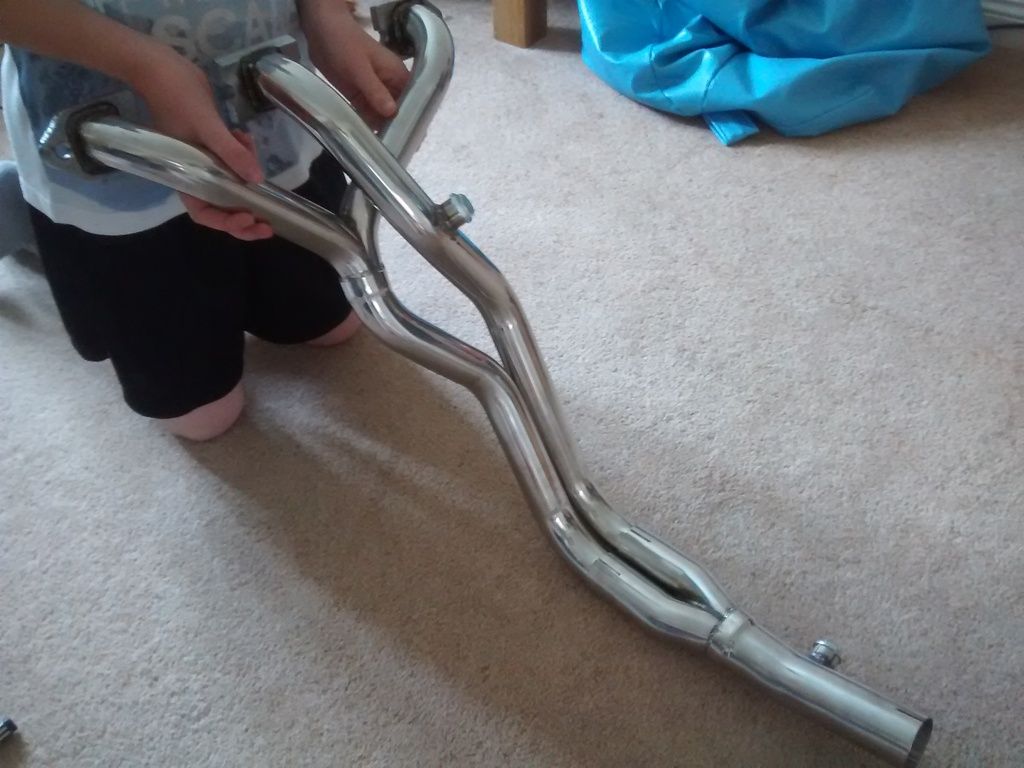
I must admit while the quality of this manifold is top notch I've never been able to achieve a total seal when using the SC manifold fitted to the mini.
I know from the wrapped Maniflow manifold, fitting this unit will be a pain in the behind - the wrap is just thick enough to push the centre pipe out of line with the head studs:
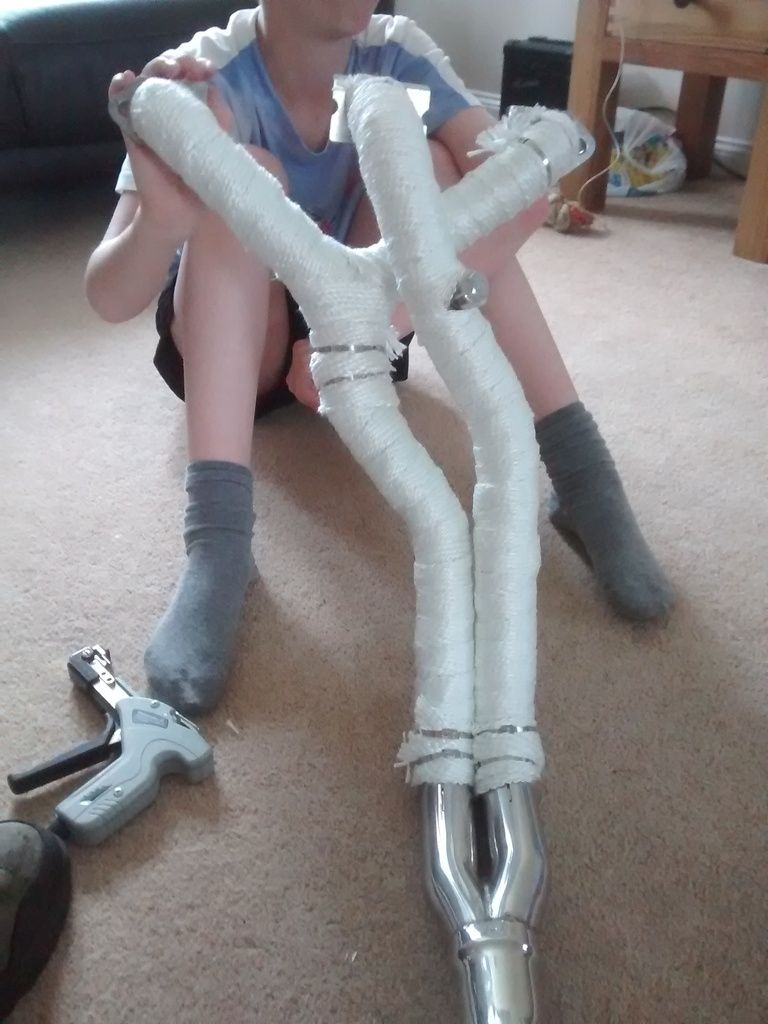
So that's done and back in the loft of the shed.
It did get me thinking though, about the exhaust system. I don't have any exhaust hangers under the car (non on the rear subframe) so will need to find a solution to this. Ideally I'd like a stainless system with a tail pipe exiting to the side of the rear panel but we'll have to have a think about the exhaust in relation to the fuel line/pump (on the underside of the floor in front of the tank). I would like to have something mocked up even temporarily for when the engines built, in order to be able to run it up. Don't suppose anyone has photos of the underside of their cars do they, to see what the options are?
I'm running out of little things that I can get done with the car propped up the way it is! Never mind - the pace will slow down again next week (back to work!) |
|
|
|
| |
Reply: 344 - 599 |
|
|
Pages: « ... 13, 14, 15, 16, 17, 18, 19, 20, 21, 22, 23, 24, 25, 26, 27, 28, 29, 30, 31, 32, 33 ... » : All |
|
|


 Mini Marcos Forum > General Boards > Mini Marcos > Right - join Part A to Part B etc, etc, etc


 Logged


